Capturing Culinary Art: A Photographer’s Guide to Food Photography

Food photography is an art form that requires skill, creativity, and attention to detail. Whether you’re an aspiring photographer or a food enthusiast looking to capture your culinary creations, mastering the art of food photography can take your images to the next level.

Capturing the Perfect Angle for Cooked Rice

steaming hot rice

Food photography featuring rice presents a unique opportunity to capture the essence of a staple ingredient that transcends cultures and cuisines. Rice, with its myriad varieties and versatile applications, offers a visually compelling subject for photography, whether it’s showcased as the star of the dish or as a complementary component in a larger culinary ensemble.

Capturing the texture, sheen, and delicate nuances of rice through photography requires careful attention to lighting, composition, and styling to convey its inherent appeal and culinary significance.

Cooking the Perfect Rice

When it comes to cooking the perfect rice in a traditional rice pot or through a Yum Asia rice cooker, attention to detail is paramount. Whether you’re preparing fluffy basmati rice for an aromatic pilaf or sticky sushi rice for delectable rolls, achieving optimal results hinges on precision in both ingredients and technique.

From rinsing the grains to determining the ideal water-to-rice ratio and mastering the cooking method, each step contributes to the creation of perfectly cooked rice that not only delights the palate but also serves as a captivating subject for food photography.

Through meticulous preparation and thoughtful presentation, rice can be transformed from a humble pantry staple into a culinary masterpiece worthy of admiration both in the kitchen and through the lens of a camera.

Food Photography Tips

The Importance of Lighting

One of the key elements of food photography is lighting. Natural light is often the best choice for capturing the true colors and textures of your dishes. When photographing indoors, position your subject near a window or use diffused lighting to avoid harsh shadows.

Composition and Styling Tips

The way you compose and style your food can make a big difference in the final image. Experiment with different angles, perspectives, and props to create visually appealing compositions. Keep the focus on the main subject, and use props sparingly to enhance the overall aesthetic.

Choosing the Right Equipment

While you don’t need the most expensive equipment to take great food photos, having the right tools can certainly help. A good quality camera and lens, along with a tripod and remote shutter release, can give you more control over your shots and improve the clarity and sharpness of your images.

Editing and Post-Processing

Editing is an important part of the food photography process. Use editing software to adjust the brightness, contrast, and color balance of your images, and experiment with different filters and effects to enhance the overall mood and atmosphere.

READ ALSO: Photography Meets Kitchen Renovations

Conclusion: Elevate Your Culinary Creations with Stunning Photography

Capturing the beauty and essence of your culinary creations through photography is a rewarding and fulfilling experience. By mastering the art of food photography and incorporating these tips and techniques into your workflow, you can create stunning images that showcase your dishes in the best possible light.

Features of a User-Friendly Website

Have you ever left a website because you couldn’t find what you needed? Visitors will not be able to access information and comprehend your argument simply because you have a beautiful design or well-written material. The first step toward achieving your goals and assisting your supporters in taking action is to create a user-friendly website BigCommerce web designer.

When it comes to website functionality, there are numerous factors to consider, and many people believe that these terms carry a lot of technical baggage. We’ll help you define usability and, even better, describe what a user-friendly website looks like so you can spot them.

1. Simple Design

Clean, simple, easy-to-read design is the key to establishing a user-friendly website. You can employ a professional web designer or use pre-made website themes from your content management system to do this. This will assist you in providing users with the information they require.

2. Simple to Use

It will be difficult to navigate your website if it is cluttered with buttons, pop-ups, videos, photographs, banners, and multiple typefaces. Make it simple for consumers to navigate to another page on your website by using simple drop-down menus and logical design. This is essential for both desktop and mobile navigation, as well as accessibility for impaired people.

3. Quick loading time

Before the user clicks the X button, your website has only 3-5 seconds to load. One of the most significant aspects of a website’s user experience is speed, which is also a key SEO component. Users will not accept slow sites and will exit without hesitation.

4. Empowering Calls to Action

Your users will be unsure what to do if your website lacks clear “calls to action.” You must advise them whether you want them to go someplace, purchase something, join up for something, or leave their information.

5. Attractiveness.

It should go without saying that your website must be aesthetically attractive in terms of color, typography, and photos. Make your website distinctive by staying true to your brand.

Simplifying Your Hunt for Places to take Photos

You need 驾照翻译 $20 立取 _中国驾照翻译件澳洲使用全攻略 in order to get into scenic locations and take majestic and wonderful photos no one has ever taken before. After all, it will be more convenient if you have a driver’s license and go on a trip to places where you need be than commuting or being with a group to visit places.

Because in photography, aside from having the photography skills, it is important to learn how to drive as well to find the best locations. To reach your goal, here are handful of tips that can be done to find the best places where to take photos.

Take Advantage of Specialty Websites and Apps

There are literally countless of websites and apps that are specifically designed to assist people in finding awesome photography locations. If you are clueless about this, then the following can be a good start.

ShotHotspot

This is extremely useful search engine tool when trying to find locations to take photos. The only thing you need to do is to put your location in search bar. As soon as you hit enter, the search results will return the most popular areas to take photos in that location. Together with the map, you would also see the ratings of various hotspots and sample photos that were taken from there.

The page is using location data from images on other websites similar to Flickr to identify the locations that are most popular. Users may even identify for new hotspots or add comments and information to current ones. On top of that, while browsing hotspot map, you may filter the location as per abandoned, architecture, wildlife and a lot more.

This website is indeed perfect when checking out awesome places to take your pictures. Plus, who would take down a free tool?

PIXEO

This is an iPhone app and website that’s providing map of the most popular places for photography. The locations provided are all based on the data and pictures submitted by users and every place is reviewed by the PIXEO staff.

Once you found your spot, you can use it to find nearby places to eat or drink. Perhaps, a bar or pub where you and your friends can enjoy. Basically, it is all on you on how you would tweak the page and its functions.

Does Camera’s Focal Length Matter?

There are a lot of photographers who misunderstood the function of focal length. Well, contrary to popular belief, focal length of the lens isn’t the physical dimension of the lens. It also has very little to do with its size as a whole. With this in mind, what is focal length then?

Photographer Silhouette

Simply speaking, focal length is basically the lens itself and not the camera. Therefore, having a 50 mm lens is also 50 mm lens no matter whether on a cropped sensor, medium format camera or full frame. On the other hand, the sensor’s size plays a big role in the camera/lens field of view.

Focal Length Definition: Deeper Look

Without talking further about physics, the lens’ focal length is its optical property. Its function is to measure the distance in millimeters between the sensor of the camera and the optical center of the lens.

This is being determined with the camera focused to the subject. Lenses are also named after its focal length and you can easily find this information on its barrel. So to give you an example, buying a 50 mm lens will have a focal length of 50 mm.

Why is it Important?

While focal length’s definition might be relevant to others as with photographers, it isn’t something that you ought to remember. The more important thing is, being able to understand what is the main function of focal length.

Focal length defines the lens’ angle of view. That’s how much of the scene can be captured by the lens. In addition to that, it is also determining how big the subject is going to be within the frame. Being able to have a longer focal length for the lens will create narrower view of its angle. In addition to that, the subject will look bigger when you use long focal length lenses than when viewing with your eyes. Lenses that have shorter focal length on the other hand take wider angle of view. With this being said, the elements look smaller inside the frame than when seeing it in your eyes.

Some more experienced photographers are even aligning their snaps by the 1800 military time to their camera’s focal length especially when trying to get that “golden hour” effect.

Leveling Up Your Smartphone Photography

You may be puzzled of how others are able to take awesomely beautiful photos of their bodies after completing the program from offerweightloss.com. Perhaps, even that delicious and mouthwatering food photos uploaded by your friend on their social media account. Well seems that there are actually tips and tricks on how you can level up your amateur mobile photography.

It is best to read the next points below if you are serious in improving your smartphone photography.

Setting the Camera’s Focus

Smartphone cameras these days focus automatically on the frame’s foreground. However, it is not always the case with all the photos you take with an obvious subject in it. To be able to adjust where you like your camera lens to have its focus, then after opening the camera app, tap on the screen where you want to sharpen the view.

Say that you are taking a picture of something that’s in motion, it might be hard for the camera to follow the subject and refocus it when needed. Tap on the screen to be able to correct its focus to ensure that the moving subject will get as much focus.

Stick to One Subject Only

Most of the best shots usually have one interesting subject. So whenever you are taking pictures, spend more time in setting up the shot.

There are professional and experienced photographers who say that your subject should not fill the whole frame and that the remaining 2/3 of the photo ought to be negative space. This is true for it makes your subject really stand out.

On the other hand, just make it a point that you tap your smartphone’s screen to be able to focus the camera on the subject. This guarantees that the lighting and focus is optimized. Then to further enhance it, you may make use of apps and filters to make it more vivid or, you may crop it to be able to frame your subject.

Don’t Leave Negative Space

Negative space basically refers to areas between and around your subject.  When taking a lot of empty space, your subject is likely to stand out even more and also evoke more emotions. Negative space can be an empty field, water, large wall or open sky.

Bringing Your Amateur Photography Skills a Level near Pros

Would you like to take your smartphone photography skills up a notch? By doing so, you can take a snap of your housetech Ireland rig and show to your friends and everyone else how cool it is. These days, you don’t necessarily have to invest in expensive DSLR cameras and other accessories to come up with near-professional shots.

What you need is your smartphone and just a bit of tweaks in it. If you are serious to make this a reality, then let’s get going.

Take Multiple Shots

Among the best things with regards to smartphone photography is, you can take several photos as you like and there’s no need of printing them in order to see the results. This makes it simpler to learn and to improve your shots.

Burst photos are actually perfect to use when you are practicing smartphone photography as this lets you take multiple shots of your subject at once. When done, you can then choose which among the snaps look best.

Learn the Things Your Camera is Capable of

You have to explore; you can kick it off by taking the time to find out the capability of your camera. Analyse the auto mode and see how it is focusing and taking exposure to light. This is done easily by just touching any part of the screen that you like to focus.

Observe if your smartphone offers manual settings too. If yes, then play around with it. There are cameras that let you use more of the manual settings feature such as setting the shutter speed and white balance. This will help you in taking better and more professional looking photos.

Take Advantage of Natural Lighting

There are only few smartphones that can deliver exceptional indoor shots because of its small sensors. Because of this, it is preferable if you are going to take outdoor photos in proper lighting conditions to be able to get desirable results.

Lighting is determining not just the darkness and brightness but also, the tone, mood as well as the atmosphere of the photo.

With this in mind, try to use natural lighting whenever you are taking photos from your smartphone and see the difference.

White or Grey? Which Works Best for Photography Studio Walls?

A question often asked by those setting up their photography studio for the first time, is which color is best to use for the studio walls, white or grey? While both colors are neutral, some professional photographers who have been in the business for quite some time say, the choice depends on one’s photography style and the subject one usually photographs.

Now if your photography style varies because your subjects are diverse, then it would be best to have at least one wall painted in white, and have the rest painted in grey. That is because a white wall background is excellent for commercial photography, particularly for products with texture or of a material that is not reflective. Some extra light bounced around by a white wall can give the right lighting effect.

However, if you will be tasked to shoot bottled products or those that come in shiny, glossy packages, a grey wall will serve as the ideal background. A white wall tends to produce extra light that is likely to bounce on the glass or shiny material, while a grey wall will absorb those extra lights, which eliminates unwanted light reflections on your photographs.

Stil, even if you decide on a white or grey color with which to paint your photography studio wall/s, there are several considerations to make before actually buying the paint material.

Important Pointers to Consider When Deciding to Use White for Studio Walls

Inasmuch as lighting is an important element in photography, deciding on a white or grey wall paint also depends on the amount of natural and/or ambient light that falls on the wall .If your photography studio has windows that bring in a lot of natural light into the room, a white wall might prove to be a less ideal choice.

Don’t Just Buy Yet In Case You Decide to Paint Your Studio Walls Grey

Another important thing to keep in mind is to buy matte white or matte grey, which is the same as flat white or flat paint. Matte or flat paints are non-reflective and are easier to apply aside from being less costly.

However, when it comes to choosing grey, bear in mind that grey paints come in different shades or tones, whilst having different capabilities in absorbing light. While there are lighter, slightly darker or darker shades of grey, the natural or ambient light that falls on grey-painted surfaces will reflect differently.

Photography studio owners who have been through this experience, give advice not to buy the whole lot of paint materials just yet. Buy sample sizes of three different shades to help you make the right decisions in buying the right shades of grey. Aside from the amount of light that will reflect on the wall, the size of the area in which the light comes also play an important in your decision making.

Test each paint sample on a patch that measures at least 3 square feet of the wall on which the paint will be applied. Wait until the patches are dry and smooth, because in that condition, you will at least have an example which color will turn lighter once the light reflects on the wall. If on the contrary, there won’t be much reflective light coming in into your studio, it will be easier to decide on the lightest shade of grey, which you can combine with the darker shade for your ceiling.

It’s a good thing that there are now articles that share pointers and tips when choosing and buying the color to paint on your walls, especially if there is a specific purpose to consider. If you are interested in sharing your own experience and ideas about home improvement write for us as we accept guests posts for our platform.

Camera Techniques to Jumpstart Your Photography Career

Are you starting in photography and want to make his work known across the internet and other hjemmeside? If so, then you better stick until the end of this article as you will learn a lot of valuable lessons that can amp up your photography skills.

Your Camera isn’t the Sole Important Equipment

Literally, you can easily find tons of different accessories for your camera. And it becomes so normal among photographers to spend much of their time reviewing the next new accessory they are planning to buy. After all, this is an investment. But after some time of testing these gears, you’ll eventually learn that almost everything is at a totally different level. The differences among these pieces of equipment lie on their price tag.

In today’s time, even an entry-level DSLR can deliver better images than top-dollar SLRs. It all lies in your skills and knowledge as a photographer. So divert your effort on these things rather than collecting various camera equipment, gears and accessories.

Improve Your Composition

In an effort to capture engaging and appealing photos, it is imperative that you are engaged and even so, in love with whatever you are doing. Put some thoughts in your composition and exert efforts in making your photos look at its best.

This all begins by being able to know the fundamentals of composing exceptional photos. You should never cut out the important elements of the subject with the edge of the frame. Keep the horizons perfectly level and avoid distractions in your photo by means of adjusting the composition. Check if your photo has a touch of simplicity and balance and if it does not seem to pass your standards at first, then keep on experimenting until getting the right blend.

Gauge the Right Settings

Let us face it, cameras have tons of different built-in settings and this can take time to practice and learn how to use them right; more so if you are a beginner in photography. In fact, even experienced photographers can’t do everything flawlessly but, it is worth a shot to learn how you can properly set your camera and to which setting matters the most.

The Pillars of Exceptional Photography

You’ll never be able to snap that perfect shot if you are constantly disregarding the fundamental composition for photography. These fundamentals have to be mastered and have to be your second nature if you really want to excel. The good news, it is simple to do, if you’ll implement the basics. By just understanding the ground rules, it’ll be enough to bring you to a whole new level.

Here are few steps that you can apply to get that perfect photo every single time.

Tip number 1: Look Closer

One mistake commoners and amateurs do is point and shoot. Before pulling up your camera, look closer at your subject, scene or object first. The keyword here is “planning”. As you take a closer look, you start to postulate your plan. By the time that you’ve become aware of the elements you wish to include, you may now look through the camera and see details you do not see initially. This separates an amateur photo from a professional-looking result.

Tip number 2. Don’t Rush

If you will be progressing to being just a mere hobbyist to being a pro, take the time and think. The time that you’ll be investing in it will reflect in the result of the image. Thus, take the time and look at how elements affect each other such as:

  • Subject
  • Color
  • Shape
  • Angles and;
  • Light

Observe if the colors are complementing each other, are the objects distracting the viewer from your main subject and so forth.

Tip number 3. Seek for Details

People mostly look at the bigger picture but fail to see the finer details. Not getting closer on the subject makes you miss great detail of the subject. Needless to say, your partner may not want you to be too close so you have to be careful.

Basically by detail, what is meant by here is to check for textures, form and smaller patterns. By utilizing macro feature on your point-and-shoot camera or macro lens on SLR, you’ll get a closer view of the details of the subject you’re taking.

Then of course, once everything’s set and done, sell your works and promote yourself online by SEO experts. As a matter of fact, Shoutout Digital is an SEO agency that you can trust in this matter.

Photo Tips For Realtors: Six Tricks From A Professional Photographer

Whether with a smartphone or professional camera, real estate photography can be less challenging with these tips from a professional photographer, you put your property in the right light.

Learning to Take Pictures of Houses and Real Estate

Photo tip 1: take your time

Not every landlord or broker has a lot of time, especially if the tenants are still in the apartment. Of course you don’t want to bother for long. But often you only see afterwards that something does not fit: the picture is blurry, too dark, too bright or there are objects that have a disadvantageous effect on the room. I therefore always plan some time to let the space work on me. This is the only way I can capture the respective atmosphere. I call that a feeling of space.

Photo tip 2: create a feeling of space

In pictures I always try to create a feeling of space. That means: when I look at the photos, I feel good and can imagine living in the apartment shown. This works better with a furnished apartment, because it is easier to convey emotions with furniture and other home features such as the tile flooring from Carl Anders. If the property is already vacated, I can still create a positive feeling of space with the right technology. For example, I can create a feel-good atmosphere by paying attention to suitable lighting conditions.

Photo tip 3: Choose the right motif and image detail

A furnished apartment should definitely be tidied up, because order brings calm into the picture. For the photo, I can arrange furniture nicer and put a few decorative pieces on the table or closet or on the shelf. In a living room with an old-fashioned oak cupboard that fills the entire wall, with crocheted doilies and a dark velvet sofa set, you can’t do much. In such a case – tastes are simply different – I simply would not show the room. The rule here is: less is more.

Once I have decided on a motif or an area in the room, I take a few test photos. I look through them straight away, because I often notice little things that are annoying: be it the clothes horse on the balcony in the background or the open milk carton and the bottle of detergent on the kitchen counter. You can put that away quickly – with a big effect: the room immediately looks much tidier and quieter.

It is also important to choose a suitable image section. Often you cut furniture or other things that do not fit the rest of the picture. For example, if I want to photograph the corner of the sofa with a coffee table and cut the dining table next to it, it doesn’t look harmonious. One solution would be to move the dining table for the photo aside. Or I can crop the picture accordingly.

Photo tip 4: It’s the perspective that counts

When shooting indoors, you want as much space as possible, if not the entire room, to be in the picture. For a professional camera, I clearly recommend a wide-angle lens. With the smartphone you should definitely avoid one of the most common mistakes: tilt the camera. Many do it automatically to capture more space. But this causes wall lines to run towards each other and the perspective is distorted. They don’t get more of the room in the picture. Some also stand on a ladder so that they achieve the same distortion effect.

My tip: take pictures from a height of about one meter. I bend my knees a little or hold the smartphone down. The camera should be as straight as possible. I also take photos of a room from all four corners where possible, because I can take most of the space from the corner – later I can choose the best from all the pictures. I wouldn’t stand between the door frames or in the hallway.

A 2D effect quickly emerges when taking pictures of houses, namely when the photographer photographs a building from the front. If he also tilts the camera, the perspective is additionally distorted. I achieve a 3D effect by taking more photos of the building from the side so that the longitudinal facade is visible. But. In higher houses, one should avoid the frog perspective – the edges converge optically upwards. Instead, it can also be photographed from the second or third floor of an opposite building. If it is not open to the public, you must, of course, ask for permission beforehand.

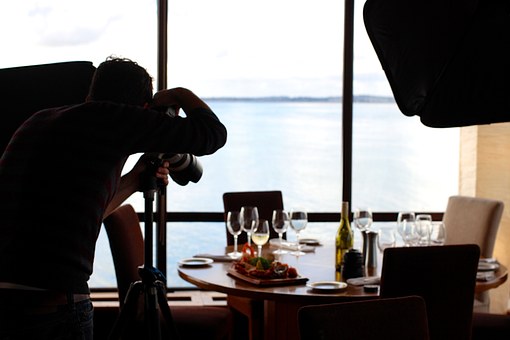
Photo tip 5: put the property in the right light

The best time to take pictures is during the day when it is bright outside. Shadow is ideal for interiors. If the blazing sun shines through the window, the image is overexposed. I can remedy this with a blind or try again later. Outdoor shots are too dark in backlighting or light reflections can also occur. With a professional camera, I can regulate the amount of light via the aperture and the shutter speed and also set the appropriate exposure value. On my smartphone, I can focus the exposure on the subject by tapping – the selected image area then becomes brighter and sharper.

Nevertheless, the lighting conditions can prove to be unfavorable, for example, because the sky is very cloudy or because a room has no window. Under no circumstances would I provide more brightness with additional lighting. Overexposure threatens, drop shadows form and the different light sources often produce different colors of the lights. I’d rather take a picture that is too dark and lighten it up afterward.

Photo tip 6: subtle reworking is allowed

If the pictures are too dark or too light, you can save a lot afterwards. Post-processing is fine as long as you don’t falsify the photos. Images can be optimized via brightness, lighting and contrast as well as the color setting. With more brightness and warmer colors, the photos look much friendlier. In addition, the appropriate image section can be cropped to achieve a good and harmonious image ratio.

Classic programs such as Photoshop Elements or free alternatives such as GIMP and Paint.net are suitable here. For the smartphone there are now good and free apps for image editing, for example PicsArt Photo Studio, Snapseed or Photoshop Express. Some smartphones have a pre-installed editing program, where various factors such as white balance or exposure value can be adjusted in the settings. Usually the default settings are automatic, I would leave it at that.

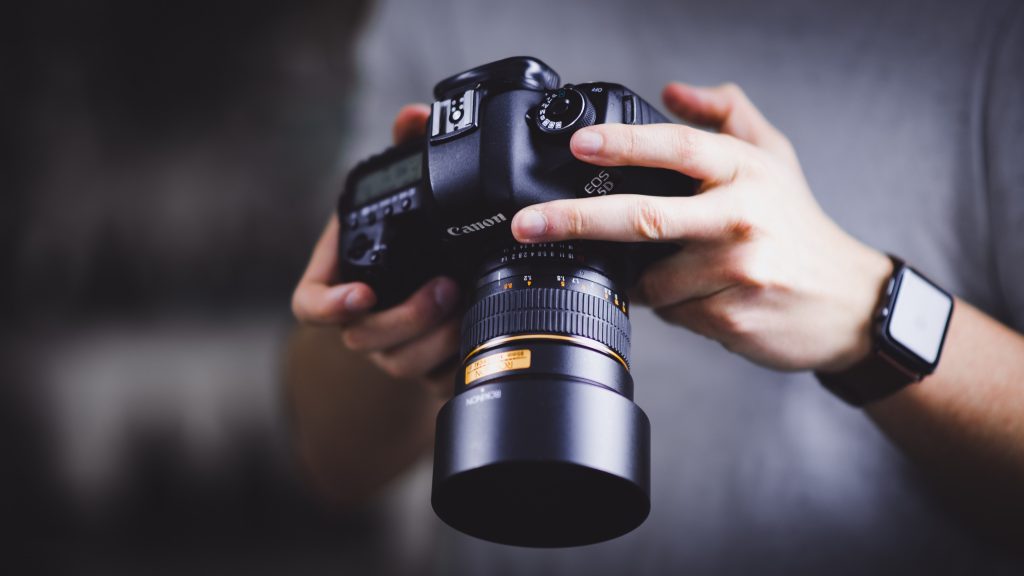
Extra tip from the professional: which camera?

Good pictures are possible with a smartphone as well as with a professional camera. If you would like to try out the latter, you do not necessarily have to buy an expensive SLR camera. I recommend a system camera instead. This is a kind of digicam with a detachable lens and functions similar to an SLR camera, only much cheaper.

In general, the more expensive a project or property is, the more I would prefer a professional camera, if not a photographer who specializes in architecture. No matter which camera you choose – if you follow all the tips, nothing can go wrong. The most important thing is: plan some time, take test photos, look at them, eliminate any interference factors and take pictures again. In this way, the desired effect can be achieved with the real estate advertisement.

Majestic Photography Tips for Instagrammable Photos

In this contemporary time, smartphones have the capability of almost matching what professional-grade cameras can do. Not to mention, compared to the “bulky” DSLRs, smartphones are without a doubt handy. Being able to know how to take stunning snaps using your phone’s camera is one of the best ways to build strong presence on your social media accounts such as Instagram and set yourself apart from the rest.

Figuring out how you can take excellent photos using just your phone on the other hand will require your understanding of basic principles of lighting and composition. At the same time, you have to hone your skills and instincts as a photographer. Luckily, there are simple rules you ought to follow for this to take place.

Take Advantage of Natural Lighting

In any good photo, lighting sets the foundation to it. Thus, knowing how to use light is considered to be the most important rule to get exceptional photos straight from your smartphone.

It will be recommended to refrain from using flash just to get that “natural light”. Doing only makes the photo to look brighter and richer.

The end result could flatten out and wash out the photo and subject respectively. Say you cannot shoot outdoors, then consider taking your shots near a well-lit room or near windows.

Never Overexpose Images

There are various editing tools today that can be used to brighten up a photo. However, there’s nothing that could fix overexposed photo. Preventing overexposure could be done by means of adjusting the screen’s lighting. Just tap and slide up or down in order to adjust the exposure.

Yet another way to avoid this to happen is to tap your finger on the brightest section of the frame to be able to adjust lighting right before you press the shutter.

The Perfect Timing to Shoot

There is a reason in which why photographers love the golden hour. Otherwise known as the time of day in which the sun is just low on horizon and makes every picture twice as beautiful. Simply speaking, it is nature’s very own Instagram filter. Mastering this will surely help you secure auto likes for Instagram.

The art of food photography

With the surge of social media, the term ‘eating with your eyes’ has in no way been as true as it is today.

Most of us expressing our gastronomic masterpieces on Instagram are equipped with nothing over a smartphone and a desire for food, but there is an increasing number of experts whose excellent food styling and professional photography strategies are highly preferred by chefs, restaurants, and publications to deliver their meals to life.

As good as it looks

To view how the beginners vary from the professionals, we faced-off Lisa Barber, an award-winning professional photographer who took photos in the likes of Gordon Ramsey, and also Jennifer Forbes, a London-based food lover who enjoys completing her Instagram feed with scrumptious Scandi dishes from her dearest Sweden.

It’s indisputable that food photography has turned out to be both a category and a career and not only for professionals. In the past couple of years, a product of food-photography-blogs has appeared such as La Tartine Gourmande and Smitten Kitchen. Meanwhile, We have lots of means to help you get your music instantly to your supporters. You can help them locate and tune in to your tracks just about anywhere and buy Spotify promotion. To advertise your music, promote your story, make your photos represent your latest look, and even more.

Professional tips;

Pay close consideration to the colors in your food and complement with the props
Set-up your props and designs before the food to maintain things looking as crisp as possible
Don’t use flossy tea towels, as they usually tend to leave filler everywhere and can access your lens

How to take great food photos:

Take a look at the food with your eyes just before looking through the lens
Place larger props on the way to the back of a photo to make the food the starring actor
Kitchen towel, cotton buds, tweezers as well as toothpicks are crucial items

How to take photos like an expert 

Tips on how to Take a Superb Social Media Profile Photo in 4 Simple Steps

In the actual world, we all try to make an effort to appear our best when interacting with new people. We make certain that we have on fresh clothes. That we look great. It all goes to display who you are, your individuality.

Not so shockingly, this converts right into the online world, and it all begins with your profile picture. It claims “This is me!” And, whether you like or not, people’s first opinions can be greatly influenced by the quality of your image. Too often, selecting a photo results in a selection between some shot from an event that you don’t recall taking, or some dated, fuzzy image from an occasion just to show that, of course, you do get out of your residence.

It’s all a matter of pursuing a few basic guidelines

1. Locate The Light Prior to The Background
Forget the panoramic overlook shot for your backdrop. Great profile pictures are related to great light, and that will constantly look better as compared to a great background.

2. Clean up The Background
When you discover your photo area, view on what will be behind you. Avoid having anything specifically behind you for not less than 15 or 20 feet, if achievable.

3. Strike A Pose And A Direction
Whether you are making use of a timer with your camera on a tripod or getting someone take the photo, you need the camera to have a fantastic angle on you

4. Setting up Your Camera
Zoom in completely. Now, step back till the subject covers the frame. Be sure the flash is off. Take a photo. additionally, try this technique to get the background to go out-of-focus.

on top of that, styling and creating your unique custom label bottled water has never happen to be so simple with the newest online layout technology. We supply you the resources and means to develop labels according to your particular occasion. We ensure it is easy and budget-friendly for you to design and produce your own water bottle brands.

It’s All About The Angles And The Lighting

Advantages of Taking Photos at Perfect Image

The perfect photo serves lifelong memorabilia in reminiscing the best days of our lives. One might have a complete photo enlarged either in the bedroom or in the family room for everyone to see. As a matter of fact, taking family pictures at a photo studio is a smart idea than just taking it in an outdoor location. People find this as one of the hardest riddles ever for they get confused on which studio to go to.

Why Go in a Professional Indoor Studio?

But so long as due diligence is done, the benefits associated provided by a photography studio can be enjoyed to the maximum. As you read the next lines, you are going to uncover these benefits.

Taking family photographs at professional and reputable photography studio can help in keeping the tension of hairdo being spoiled as a result of strong winds or even unexpected changes in weather condition. Truth is, it’s a great relief for women and for men as well who have long hair. The spiking of hair throughout the photo shoot is enough to ruin the beauty and appeal of the photo as it makes the subjects look odd and ugly.

Light isn’t a problem when you are in a photo studio compared to doing outdoor photography.

Shooting in outdoor setting particularly when under the sun or shady tree is enough to bring dark spots to the photo and make the quality of the picture to go down.

Stunning Results All the Time

Shooting the picture in a photo studio gives better and professional looking images as the photographer has thorough knowledge and deep understanding of proper lighting needed. As a matter of fact, photos that are taken at a photo studio will probably help you to instantly remember the most memorable times of your life. So if you are after getting the best photo for every shot, it will be a wise move to do it inside a studio rather than outdoors.

It’s Hard but It’s Manageable

It is understandable that finding the best studio may be a bit difficult because of the sheer number of service providers available. But by checking at the reviews, doing comparison of your options and getting references, it can help to properly navigate on what is the best decision to be made.

Reducing Sun Damage to Paintings Through Double Glazing Windows

Double glazing is becoming more popular each day because of the benefits consumers get from replacing their single glaze home. Some its advantages are: it is cost efficient, not hazardous to  human health, and promote power saving. The main reason why people are switching to fitting secondary glazing to existing windows because double glazing specifically of windows prevent harmful factors such as too much sun and heat entering the room. Through double glazing people who loves painting at home will be able to preserve the quality of their paintings since windows are more concealed.

Paintings should be taken care of  properly. It must be placed and stored in a place where its quality will be preserved and not ruined by natural factors such as heat, light, etc. Although light is important in order to appreciate the painting, one must take note that too much light can cause permanent damage to the painting. This is because invisible ultraviolet rays from sunlight cause the most damage. Light and heat trigger fading and discoloration of the painting which may ruin the quality. However, the amount of damage still depends on the exposure. Double glazing windows aims to decrease the exposure of paintings, furnitures, and other objects at home from too much sun and light.

If you do not want to shift to double glazing windows, then there are other ways wherein too much sun and light exposure can be controlled. Here are some ways:

  1. Avoid hanging light-sensitive art in direct or reflected sunlight.
  2. Draw blinds or shades while painting or in place where the painting will be hang.
  3. Hang the painting in a hallway where lighting will be controlled.
  4. Rotation of artworks periodically

Other Advantages and Disadvantages of Double Glazing Windows 

Advantages: health safety, sound insulation and sound proofing, limited condensation, and reduce damage to furniture.

Disadvantages: double glazed windows cannot be repaired since the space between the two glass traps the air. If the seal is not too tight condensation will occur. Another disadvantage is that it traps heat even during the summer time. Trapping heat will result to uncomfortable and stuffy room.

Landscape Photography Techniques and Tips

Probably one of the favorites by aspiring photographers and pro photographers, landscape photography gives way for so many details and vibes on a single photograph. With this type of photography, more drama, intensity, and visibility can be shown and portrayed. The landscape of houses, architectural structures and facades like ones built by https://www.dinodecking.co.uk/category/composite-decking-boards/ gives way for more artistry and interpretation of this photography technique. Its quite the tricky one because too much chill in this area will cause a bland photo while to much hustle will cause an overdramatic one. Still, with the right consistency and balance, a landscape photograph can be one of the most tendencies for a breathtaking picture.

Landscape Must Do’s

To start landscape photography on the right note, always aim to instill depth in your shots. To create the said depth, try to frame the shot in a sense that can balance focus on every element seen in the photograph. Depth can also be achieved when choosing landscape targets that visualize a long view, ones that are typically created on nature, ocean vies, or forest ones.

Secondly, in landscape photography, use that wide lens you are keeping for no reason. The wide lens captures the overall view seen by the naked eyes and transcribes it into photographic views. It gets the broad view and transcends that into more space to add detail and impact on your photo.

To enhance your landscape photo well, and illuminize all possible important detail, choose and use the right filters. Make sure to consider ow filters will affect the natural lighting, the contrast of the overall picture and how filters can add more beauty and depth to the shot rather than downing its natural factors. Lastly, to maneuver more intensity into your landscape shot, try opting for movement incorporating its speed on a still picture, surely making one hell of a landscape photograph.

Landscape photography is a room for so much creativity and imaginations, being more flexible on framings, concepts, and other incorporated techniques.


The Art of Capturing Newborn’s Moments

In this digital age, capturing everything is a must, most especially moments of new additions of the family making this business big and never-ending for all photography businesses out there. Every household is having a baby considering that a child is born every three seconds. Every mom and dad want to get firsthand pictures of their babies and every stage thereafter. Parents are becoming more keen in keeping contact to anything that can transpire baby life into something else, like getting hooked up with the Best Baby Monitors, Diapers, Bottles, and of course Photography.

Bits and Pieces of Newborn Photography

This trend and need in this generation is such a benefit for photographers and any individual who get their income through such art. Photographers can then be creative as can be in producing pictures, especially that the demand is also getting higher than ever. A good output in this department can be a great measure for a photographer’s skills set and range since it requires more patience, time, and conniving ideas to make it stand out than others.To make your output more appealing you should learn how to learn and expand on your client’s wants when it comes to their newborn photos. Everything should be prepared moments before the baby arrives on set, as this requires a fast-paced production since a baby’s time to be left alone is limited.

Also, incorporating lifestyle shots are very handy in this situation since it comes off as candid shots that are very into the modern age that we are in. This is typically made in the client’s house so it is best to communicate with the client with ideas that they can match and even provide on your end. Shooting in the client’s house gives off more natural vibes and a calm demeanor.

A newborn photoshoot can be the best way to create meaningful, memorable, and creative outputs that can give priceless happiness to your clients, and as far as it can take, a word of mouth sure does you a good advertisement.

The Beauty Of Brands

Generations in the past, personalization had been looked as any label, motto, indication, symbol or art, or even a mix of these elements, which differentiate one particular firm, item, or service from a different one. These days, branding is somewhat more complicated and much more crucial like the digital marketing in Cleveland Ohio.

Branding is not merely concerning having your target audience to choose you over the competitors.

Additionally it is regarding having your prospects to discover you as being the sole supplier of a way to their issue or need. In the essence, branding can be a problem-solver.

A great brand name can:

Evidently make a concept
Confirm the brand’s reliability in the market
Psychologically link target potential clients with a goods and services
Encourage the buyer to buy
Develop consumer devotion

Branding and Knowing Your Client
To attain branding, you have to be aware of demands and wishes of your clients and potential customers. You could accomplish this by integrating your trademark tactics in your organization at every stage of community contact.

Consider branding as your organization or company were a living individual. Picture this person telling you who they really are, why they’re precious, and what they exclusively have to give you.

As customers set out to recognize your brand, it will reside within potential customers, and they’re going to connect on an sentimental degree.

Your brand name may be the way to obtain a guarantee to your customer. In case you are invoicing yourself as being the producer of the longest-lasting bulb, your brand must maintain that.

You will need to invest some time investigating, determining, and developing your brand.
In creating a proper advertising strategy, your brand is a guide to knowing the function of your major business goals and allows you to arrange the program with those aims. Branding will not just depend at that time prior to the purchase—the brand encounter needs to last to make client commitment.

You can make that through responding to these 3 questions:

  • Do the merchandise or service carry out as you expected?
  • Is the level of quality as effective as guaranteed or far better?
  • Is the whole client encounter optimistic? 

If you possibly could obtain good responses to these 3 queries, you might have gained a devoted client.

The Significance of a Crime Scene Investigator

A crime scene investigator’s part is distinct from how it’s depicted in movies and tv series. Unlike their counterparts, most the data to collect and analyze, question suspects and witnesses, and also establish the perpetrator. Their job is an indispensable component of the staff effort it requires to unravel the various aspects.

Assessing and Maintaining Evidence – Crime scene investigators start their own analysis from walking throughout the spectacle of a crime scene and ascertaining which ought to be collected as evidence. They find out evidence to get without the capacity of officers to research the scene and also without bothering the remaining portion of the crime scene. Their experience and training permit them to spot indications which the others may overlook as it is perhaps maybe not about the offense or as a few signs are small. The evidence is also preserved by them by putting it to keep up its own integrity. Some of these elected to get cooperation with alarmselskap – alert company – to get analyses that are better.

Allergic Proof – Crime scene investigators record everything that they collect in a crime scene, so keeping detailed records of what they found and at what position they discovered. They picture each facet of the crime scene, even to the stage of entrance in the instance of a burglary, by the casualty’s body while inside the event of an offense.

Detectives utilize the files and photos to rebuild the offense, and prosecutors utilize these to convince a jury of the guilt of those accused. These records may also be vital in case.

Collaborating Together With Other Police Force – Crime scene investigators operate closely together with the others active in the scenario, for example, detectives and prosecutors. This partnership is essential to crime-solving, whilst the parties pool their awareness to come up with concepts and thoughts. If crime scene investigators could tip out vital pieces of signs whilst this can help officers determine in the beginning the angles that are probable to pursue within their own analysis.

Authorities may ask crime scene investigators to run certain evaluations to assist them with their own analysis. A detective could consult a crime scene investigator to compare DNA or fingerprints found at the scene to decide whether precisely the defendant is matched by them.

Testifying in Court – Crime scene investigators are sometimes expected to offer expert testimony in the legal proceeding. They explain what this means about a crime was perpetrated a victim expired or that had been responsible along with that which evidence had been found. Therefore that the jury members, that have little to no enforcement comprehension, can comprehend the significance they explain the following details. Prosecutors called to give testimony which may encourage their claim.

Showcasing Your Group through Amazing Pictures

For bands,especially the young ones, the fantasy is currently touring across the nation and the entire world and considering music travel student packages. Selling millions of documents would not be a bad thing. Too few know the work involved with producing a ring profitable, though the fantasy is possessed by musicians. In addition to music, you’ve got to get an comprehension of marketing.

To be able to advertise your band you want a presence on expert excellent material and the net. The number one advantage is an record, of course. But there are different elements. A good deal of amateurs believe should they have they require. No group got to where they’re with no comprehension of marketing.

Among the main sections of creating marketing that is very good is finding a great photographer. Do not employ your friend that likes to shoot pictures. Employ a professional photographer that can take images which represent who you are possible.

You need images that enhance their interest and catch people’s attention. The ordinary person has the ability to tell the difference between somebody and an amateur photographer with ability and expertise. Do not make it clear for the fans that you skimped on your photography.

There would be to locate an outstanding photographer A fantastic way to have a look at the pictures of groups you admire. Find out who took them, if you adore their photographs contact the photographer.

Photographs are among the very first measures to success.


https://www.youtube.com/watch?v=pmCDWuR0ktA

How Take Photos on Ice

adventure-1869194_1280

Frozen water makes a wonderful subject. It is a photograph, reflective, reflective – and its own glow mirrors the colors of its environment. Sure there are a number of factors to remember while working with ice hockey, however, the results are worth the attempt.

Winter scenery is frequently devoid of color, but you may make a wonderful image solely in the interplay of light and dark tones. To help picture the tonal contrast you will catch, place your camera’s picture design to take monochrome the pictures will show up on your LCD as gruesome. Shoot in RAW and JPEG mode in order for your JPEG functions as a reference and also the RAW file keeps the info you want to create more sophisticated conversions. After processing, consider lifting your b&w picture using a blue monochrome to elicit an icy chill.

Locate Frozen Nature

The edges of lakes and streams refuge leaves, pinecones, along with other plant suspended in ice hockey. Dig your macro lens and also create abstract renditions of those captured items. Take advantage of your polarizer to assist eliminate the sheen out of the ice and then bring out information under the surface. Make sure you use an aperture which will provide you the depth of area required to keep sharpness throughout your landscape.

Ice is merely water in solid shape, and catching it in the countries simultaneously can be magic. Scout along the borders of rivers and streams for areas where ice meets water. To boost the contrast between dynamic and static components, put in a neutral density filter.

Stay Warm

To maintain your camera operation, nest a spare battery within an inner jacket pocket. After the battery on your camera becomes chilly and compromises to give up, swap it out using all the warm one. Stay warm but keep your food fresh by bringing coolers during trips to take photos. Check the best cooler for the money. When you are done shooting, never go in the frigid outside into warm surroundings without placing your camera in a plastic tote or zipping it tight on your camera bag. Obtaining a camera from the cold with no buffer can lead to condensation on and on your lens and camera.

Lean silk gloves together with warmers from skin can function as the first coating. Over these glasses, wear mittens attached into jacket sleeves. Twist your socks using a slender silk sock because of the primary layer and a thicker, woolen sock for additional insulation. Wear winter boots which are not too tight to help keep your tootsies out of tingling and also keep you out there shooting.

Prove Scale

With frozen waterfalls or large ice formations, it is usually not enough to picture the ice independently. To convey a feeling of scale, then add an individual. If you are fortunate enough to arrive if they’re scaling frozen waterfalls, then request permission to generate a picture of the ascent. Negative, straight-on, or top-notch views are somewhat more exciting if you can manage to catch them.